
Distance Learning Tips and Tricks > Schoology Tips and Tricks
What is Schoology
Schoology is a “learning management system,” which basically means it does what Google Classroom does, but has some additional features. You can think of it as an upscale version of Google Classroom.
Creating Assignments
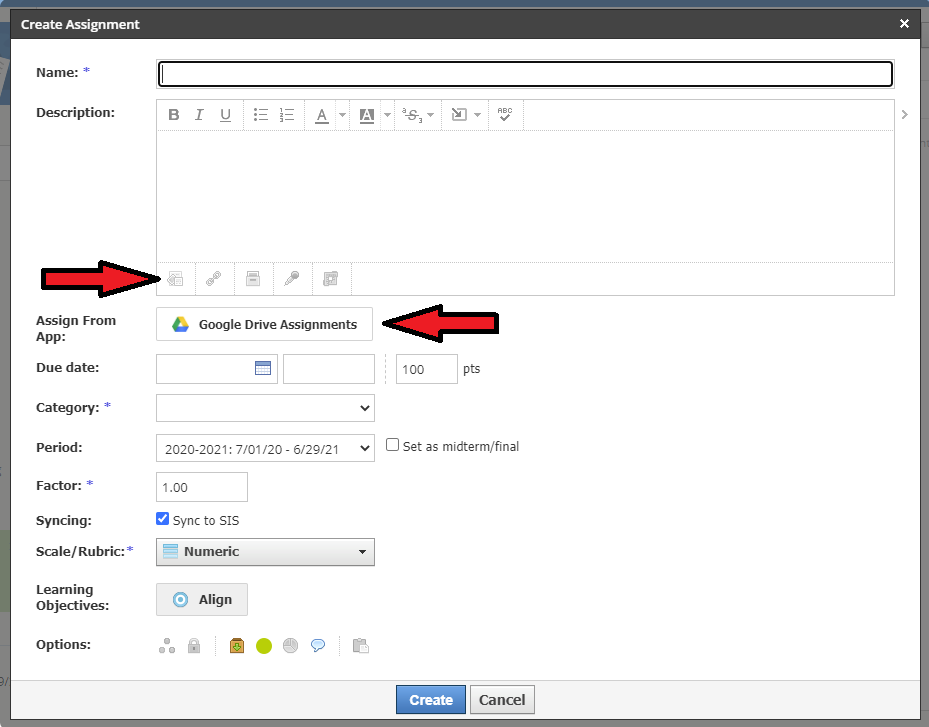
Most Schoology navigation begins at the top of the screen. Click the word Courses and click the course you want to work on. Now look at the navigation on the left. Click Materials and then use the Add Materials drop down to add an assignment. A box opens up. Give your assignment a name and then add a more complete description. You can add files or materials from Google Drive using the buttons indicated by red arrows below. Here is a short video.
Assigning Work to Individual Students
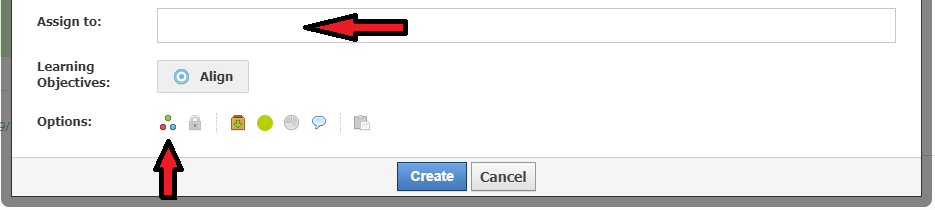
In Schoology at the bottom of the assignments dialog box, click the first icon to the right of the word Options at the bottom. This brings up an “Assign To” field where you type in the names of the students who should receive the assignment. After you start typing, the names will pop up as they do in an email.
How Students Submit Work
Most of our work is in Google Documents. This makes sense since we are going to one on one computing with Chromebooks. Here is a short video on how to open and submit Google Drive Assignments on Schoology. You may share this video with students.
Turning in Work On Paper
WHAT’S WITH THE CAMERA APP?
Grading Work
Use notifications, but NEED THE PROPER WAY TO RETURN THESE SO THE STUDENT SEES THEM IN NOTIFICATIONS.
Passing Work Back and Forth
NEED TO FIGURE OUT HOW STUDENTS PASS THE WORK BACK. DO THEY NEED TO CHECK EACH ASSIGNMENT EVERY DAY?
Adding Staff to Classes
To add teachers or assistants to a class click Courses at the top of the screen and then click the my course link at the top right of the window that appears. To the right of each class is a gear pointing down. Open that to add members. Once the member is added, open the gear again and choose Edit Member. By the person’s name, choose Make Admin. You can have more than one admin for a class. Here is a short video.
Managing more than One Section of a Class
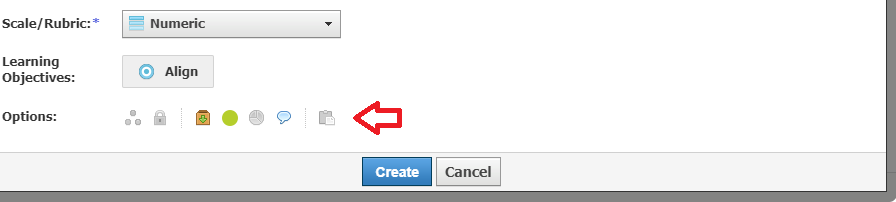
If you teach more than one section of a class (for example, I have 10 sections of fourth grade technology), you can create an assignment once and copy it to as many classes as you like. At the bottom of the assignments window, click the icon on the far right as shown:
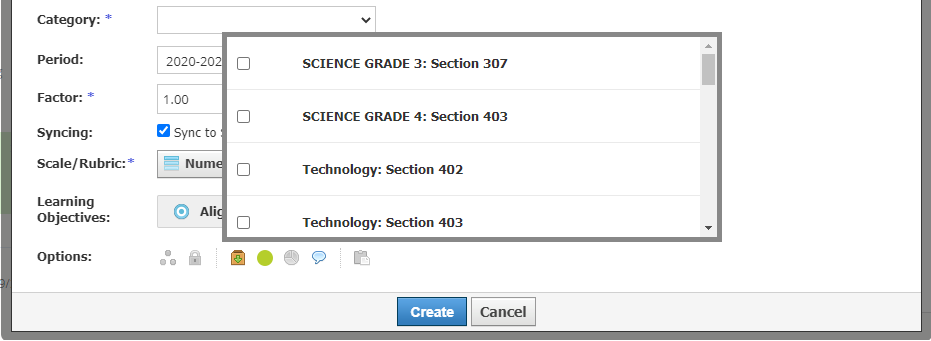
A list of available sections opens. Check off the sections you would like to copy the assignment to.
Distance Learning Tips and Tricks > Schoology Tips and Tricks